 AasimNaseem
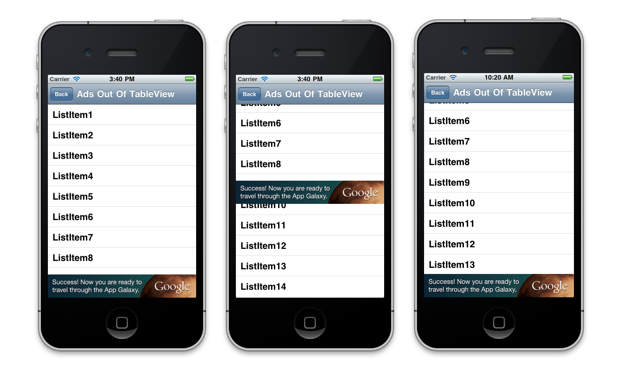
 Now you can download the AbMob SDK, it is required for publishing Ads and drag drop into the Xcode project.
 Step 5: We need to add framework in project, so select the framework -> add New Framework -> Select AudioTollbox.framework, MediaPlayer.framework,MessageUI.framework and SystemConfiguration.framework add in the Framework folder.
Step 6: We need to add one background image in the project.
Step 7: Open the AdmobiPhoneViewController.h file, in this file we need to import GADBannerView.h file and create a instance of GADBannerView class. So make the following changes:
[sourcecode language="objc"]
#import
#import "GADBannerView.h"
@interface AdmobiPhoneViewController : UIViewController {
GADBannerView *AbMob;
}
@end
[/sourcecode]
Step 8: Now open the AdmobiPhoneViewController.m file and make the following changes in the file.
[sourcecode language="objc"]</pre>
<div>#import "AdmobiPhoneViewController.h"
#define AdMob_ID @"a14dccd0fb24d45" // You can get this id from www.admob.com. This is Publisher ID
@implementation AdmobiPhoneViewController
- (void)dealloc
{
AbMob.delegate = nil;
[AbMob release];
[super dealloc];
}
- (void)didReceiveMemoryWarning
{
// Releases the view if it doesn’t have a superview.
[super didReceiveMemoryWarning];
// Release any cached data, images, etc that aren’t in use.
}
#pragma mark – View lifecycle
// Implement viewDidLoad to do additional setup after loading the view, typically from a nib.
- (void)viewDidLoad
{
[super viewDidLoad];
AbMob = [[GADBannerView alloc]
initWithFrame:CGRectMake(0.0,
self.view.frame.size.height -
GAD_SIZE_320×70.height,
GAD_SIZE_320×70.width,
GAD_SIZE_320×70.height)];
AbMob.adUnitID = AdMob_ID;
AbMob.rootViewController = self;
[self.view addSubview:AbMob];
GADRequest *r = [[GADRequest alloc] init];
r.testing = YES;
[AbMob loadRequest:r];
}
- (void)viewDidUnload
{
[super viewDidUnload];
// Release any retained subviews of the main view.
// e.g. self.myOutlet = nil;
}
- (BOOL)shouldAutorotateToInterfaceOrientation:
(UIInterfaceOrientation)interfaceOrientation
{
// Return YES for supported orientations
return (interfaceOrientation == UIInterfaceOrientationPortrait);
}
@end</div>
<pre>
[/sourcecode]
Step 9: Now compile and run the application on the device.
Step 5: We need to add framework in project, so select the framework -> add New Framework -> Select AudioTollbox.framework, MediaPlayer.framework,MessageUI.framework and SystemConfiguration.framework add in the Framework folder.
Step 6: We need to add one background image in the project.
Step 7: Open the AdmobiPhoneViewController.h file, in this file we need to import GADBannerView.h file and create a instance of GADBannerView class. So make the following changes:
[sourcecode language="objc"]
#import
#import "GADBannerView.h"
@interface AdmobiPhoneViewController : UIViewController {
GADBannerView *AbMob;
}
@end
[/sourcecode]
Step 8: Now open the AdmobiPhoneViewController.m file and make the following changes in the file.
[sourcecode language="objc"]</pre>
<div>#import "AdmobiPhoneViewController.h"
#define AdMob_ID @"a14dccd0fb24d45" // You can get this id from www.admob.com. This is Publisher ID
@implementation AdmobiPhoneViewController
- (void)dealloc
{
AbMob.delegate = nil;
[AbMob release];
[super dealloc];
}
- (void)didReceiveMemoryWarning
{
// Releases the view if it doesn’t have a superview.
[super didReceiveMemoryWarning];
// Release any cached data, images, etc that aren’t in use.
}
#pragma mark – View lifecycle
// Implement viewDidLoad to do additional setup after loading the view, typically from a nib.
- (void)viewDidLoad
{
[super viewDidLoad];
AbMob = [[GADBannerView alloc]
initWithFrame:CGRectMake(0.0,
self.view.frame.size.height -
GAD_SIZE_320×70.height,
GAD_SIZE_320×70.width,
GAD_SIZE_320×70.height)];
AbMob.adUnitID = AdMob_ID;
AbMob.rootViewController = self;
[self.view addSubview:AbMob];
GADRequest *r = [[GADRequest alloc] init];
r.testing = YES;
[AbMob loadRequest:r];
}
- (void)viewDidUnload
{
[super viewDidUnload];
// Release any retained subviews of the main view.
// e.g. self.myOutlet = nil;
}
- (BOOL)shouldAutorotateToInterfaceOrientation:
(UIInterfaceOrientation)interfaceOrientation
{
// Return YES for supported orientations
return (interfaceOrientation == UIInterfaceOrientationPortrait);
}
@end</div>
<pre>
[/sourcecode]
Step 9: Now compile and run the application on the device.
from: eduMobile;
Comments (7)
I'm just having little error. what should i do this is the error msg :
use of undeclared identifier GAD_SIZE_300
in file : mainViewcontroller.m
<a href="https://github.com/111vandana/AdMob_Demo/archive/master.zip" rel="nofollow ugc">AdMob_Mediation_Demo</a>
You can download it and use it in your project
Leave a Reply